We’ve been developing a custom Tecan Fluent Nest and would love your feedback. Our main goal is to make Tecan deck setups both easy and error-free. We’ve taken inspiration from the “put-to-light” concept (commonly seen in warehousing or fulfillment operations) and adapted it for setting up the deck. The idea is that the user scans a plate and then a light will turn on for the appropriate nest.
After finalizing our design, we plan to open-source it so that others can benefit too.
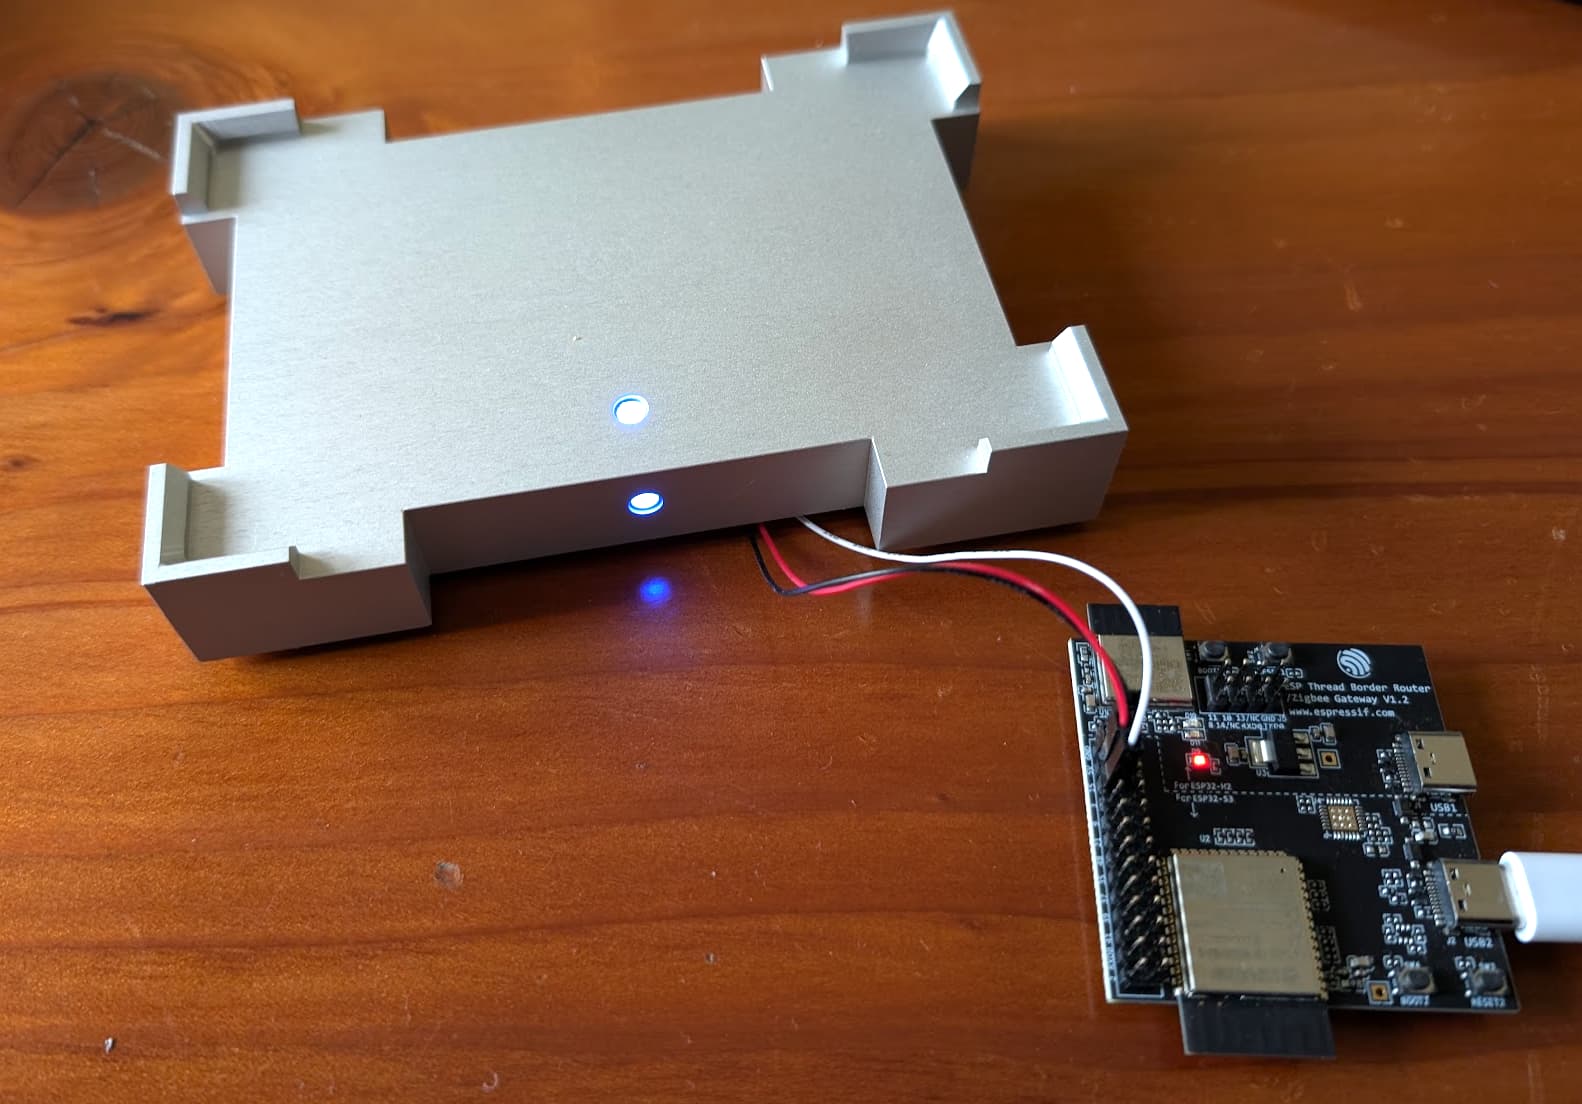
ESP32, connected to both the addressable LEDs and the barcode scanner
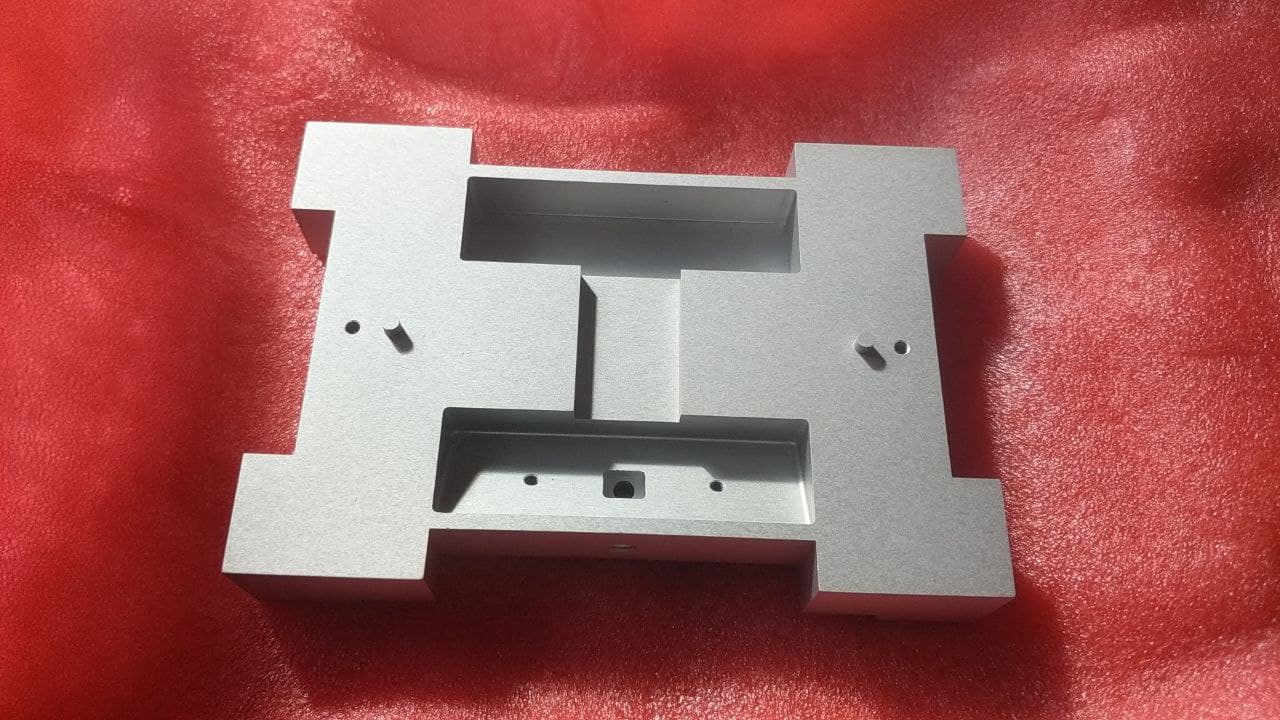
Custom Machined Tecan Nests
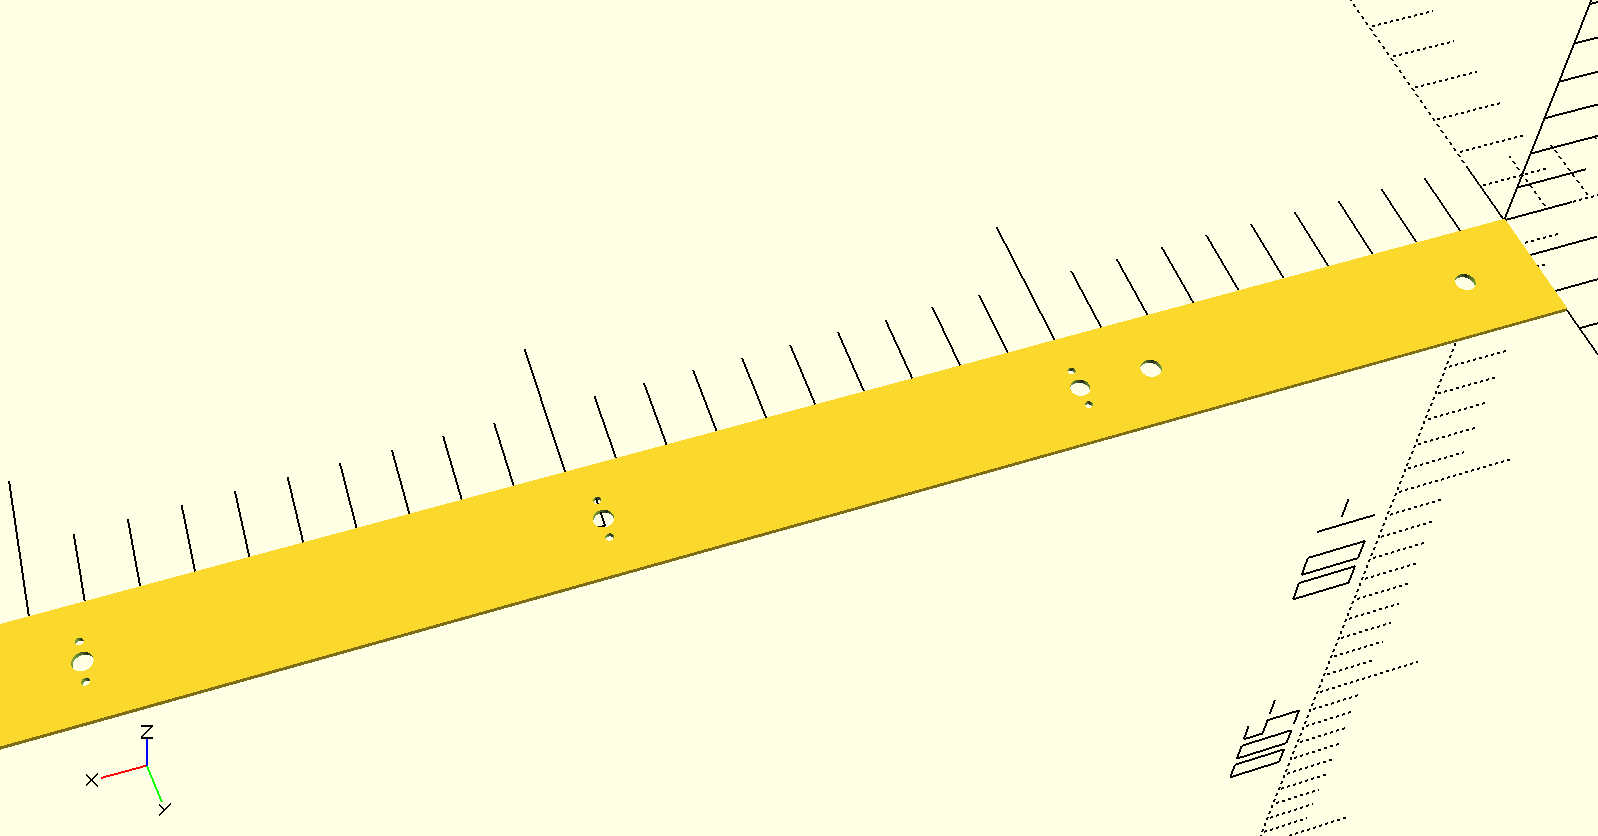
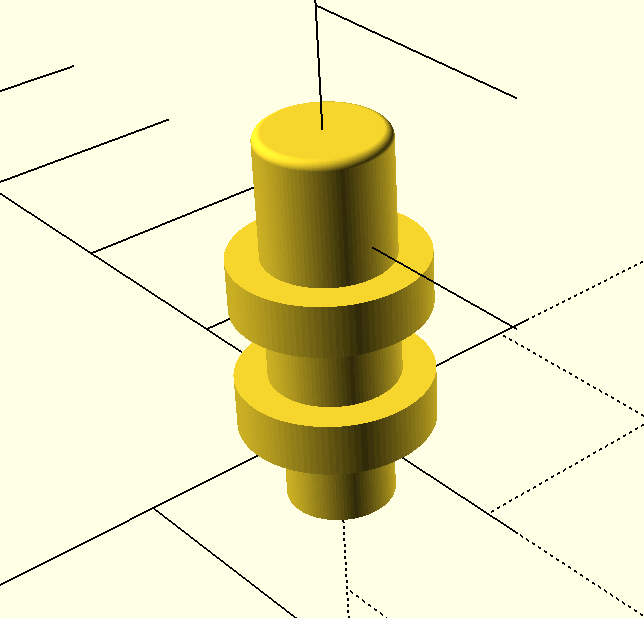
Attached are photos of a prototype Tecan Nest we recently got machined. The holes at the top and front will fit LED light tubes, which also help prevent moisture ingress.
Questions and Feedback
The nests are machined to fixed dimensions and aren’t adjustable for plates that slightly deviate from the SBS footprint. Any suggestions on mitigating this? (We only plan to use 384- and 96-well plates, but still want to consider tolerance issues.)
This is my first time designing parts for machining. Any tips on improving manufacturability, cost-effectiveness, or durability?
I have a couple of questions, suggestions & observations:
Is that the controller you’re going with?
Compute cost wise: If all you need is ESP32 I’d look at something akin to XIAO boards from Seed. They’re super cheap and tiny.
Convenience wise: If you want MicroPython or CircuitPython support out of the box the QTPy form factor from Adafruit is elite, although the neopixels are not necessarily cheap at scale… Adafruit also has a super active Discord.
It might be good to have a 3D printable option so folks can adjust the sizes but still maintain the structure for keeping a board in place.
Machining: If it has to be machined, reduce excess components (the base looks super thick) & choose a cheap but sturdy metal.
Consider making the tabs a separate component that can be adjusted for size (think of for example the metal tabs on the Lynx or the original Hamilton nests which do require replacement.) Or what if the tabs are 3D printable and screwed on?
Cost: In my experience with machine parts, you basically have to order at bulk to get a sweet discount unless you have something akin to a TorMach at your spot.
Lights: The light at the top of the nest could be a problem for light sensitive reagents. Is that necessary there if you already have one in the front?
Also the Tecan Fluent has a wide variety of deck segments, some have gaps within the deck segment for cabling to go through, I think you can pair something like this with those nests and it would be a win.
If you have a Fluent 1080 and you want to replace your nests with these, each individual dollar cost swill add up. I think each nest is maybe in the range of $60-80? It’s custom, sturdy and conductive bit of plastic tho so it’s not just 1:1 with 3D printable plastics.
Also reminder that you can rig to the Tecan and take advantage of the boards at the front of the deck, this is how for example they power solenoids and other simple I/O items.
Just sharing ideas here but I can imagine something similar at the deck segment level. Imagine a strip of neopixel lights hat light up next to the nests. It would work with any setup as long as you can fit the neopixels in the spaces between segments.
Thanks so much for sharing all those ideas, really appreciate the enthusiasm! Here are a couple of follow-up thoughts:
One of the nice things about these addressable LEDs is that we only need a single control board for the entire Fluent deck, since the LEDs can be daisy-chained. I don’t have strong feelings about which board to use, but I do like ESP32s in general. Looking into whether we can tie directly into the Tecan’s onboard I/O is a great suggestion. I’ll explore that further!
The notion of having 3D-printed tabs or a Lynx-like solution is really appealing. Maybe we can machine small “rims” or “channels” on the nest where 3D-printed tabs can snap in. That way it’s easy to replace or adjust them for slight plate variations without having to remanufacture the entire nest.
We have two Fluent 1080s, so a per-nest cost of around $50 is still manageable for us. But I get how that might add up if someone has a larger fleet. If the design is open-sourced, perhaps people can choose whichever manufacturing route (machining vs. printing) fits their budget or number of instruments.
Thanks for sharing the 3D model link! I tried printing that nest before but didn’t have the best results, probably needed to dial in my 3D printer settings a bit more. Machining felt like the more reliable approach for now. Still, I’ll definitely provide a 3D-printable version (or even better, a parametric OpenSCAD script) so others can tweak and iterate on the design more easily.
I actually considered just running a light strip along the deck, but I wasn’t a big fan of the aesthetics. The integrated LEDs in the nest seemed neater to me. That said, I can see how an external strip would be more flexible and maybe simpler to install, so it’s definitely worth keeping in mind.
The top hole isn’t strictly necessary indeed. We don’t work with light-sensitive materials (yet), but good to take that into consideration!
Thanks again for all the feedback! I’ll keep refining the design, and once everything’s finalized, I’ll share the open-source files so the community can adapt them as needed.
If you wanted a closed loop set up, you could explore adding a proximity sensor that turns off the light once it senses a plate has been loaded. That’s one way to manage for light sensitive reagents but not sure if you can daisy chain them as simply as LEDs.
One of the nice things about these addressable LEDs is that we only need a single control board for the entire Fluent deck, since the LEDs can be daisy-chained.
I see now, yes that makes sense.
We have two Fluent 1080s, so a per-nest cost of around $50 is still manageable for us.
I’m sure some labs would happily pay more per-nest for an improved loading experience.
…considered just running a light strip along the deck, but I wasn’t a big fan of the aesthetics.
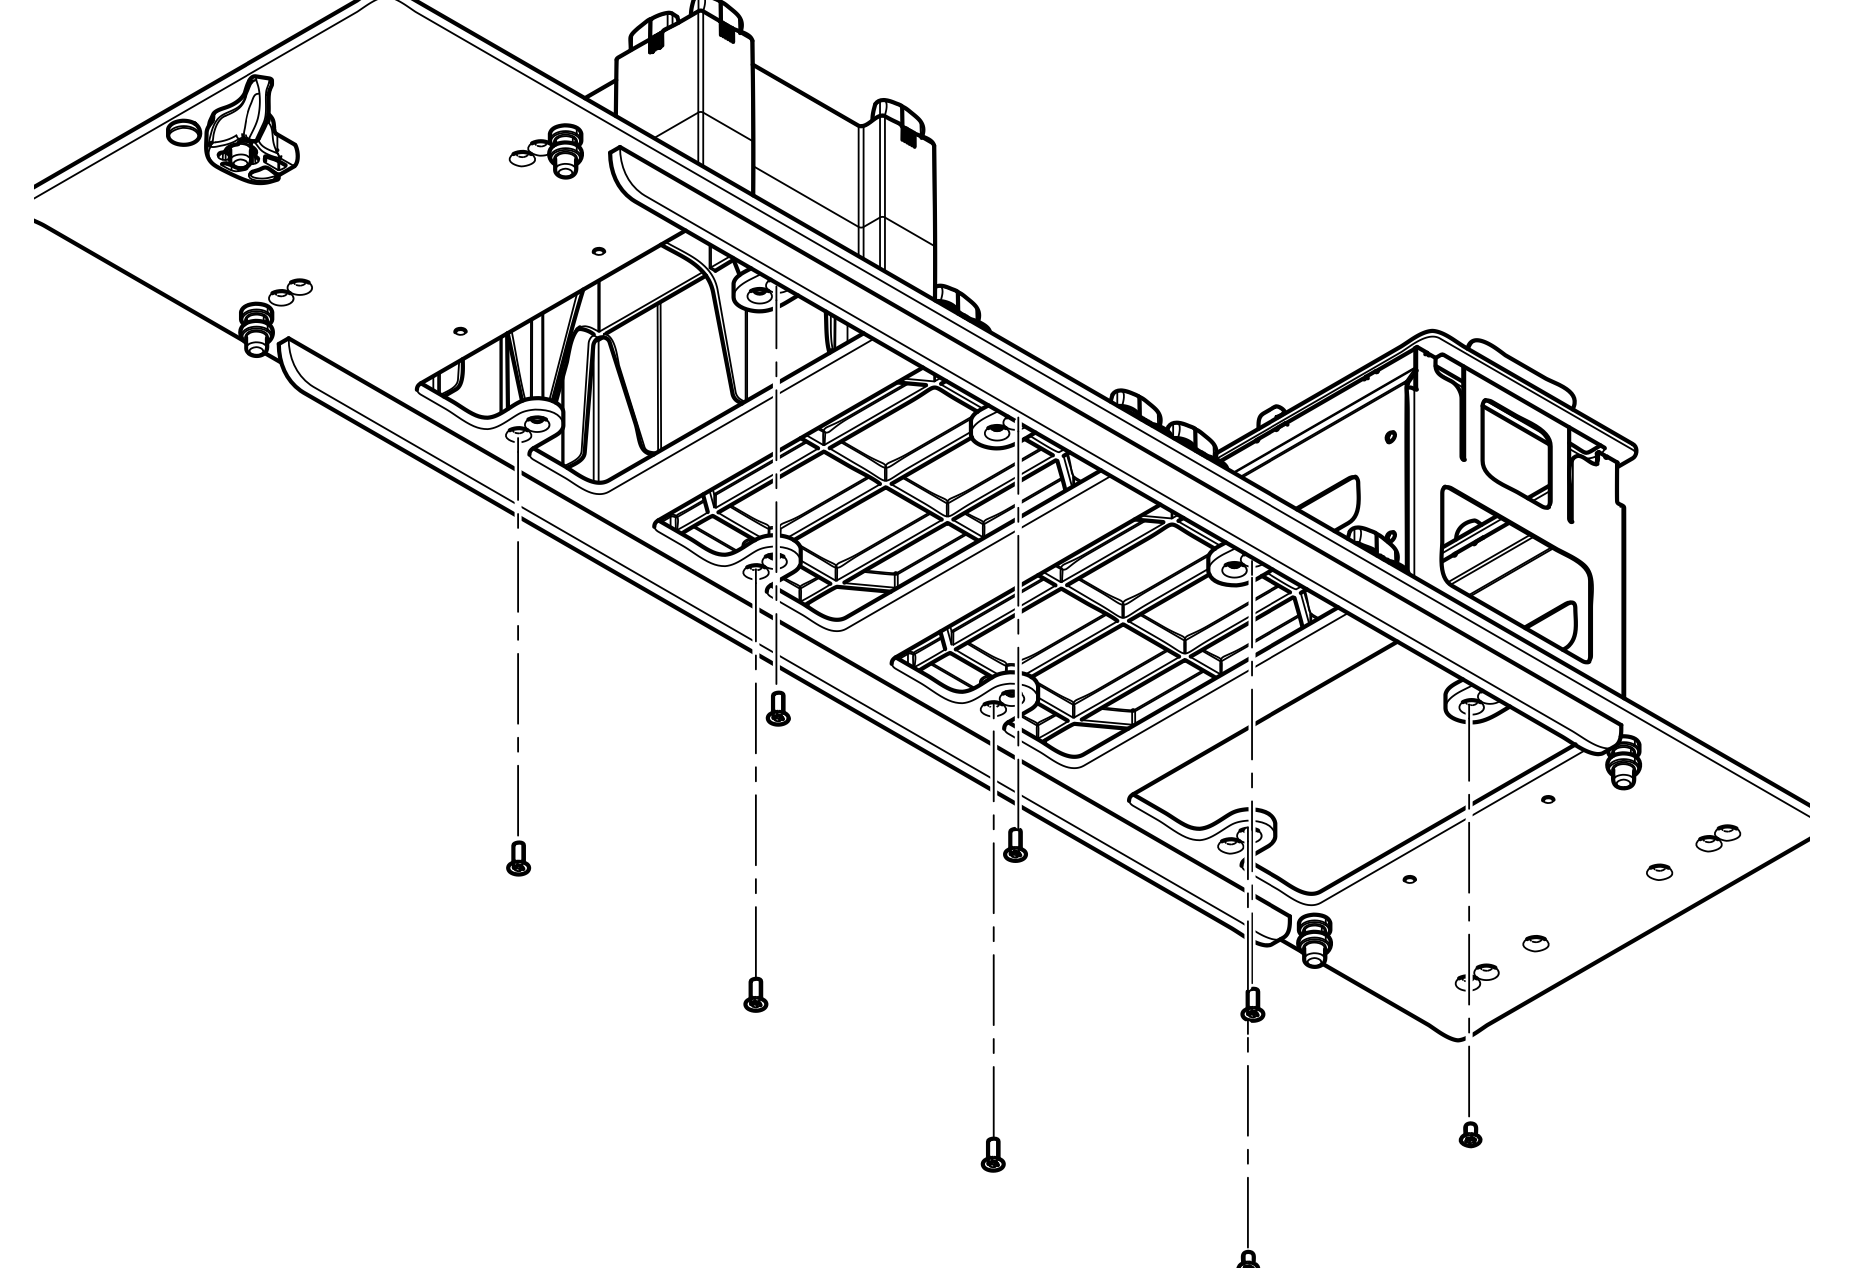
With the introduction of the MCA96, I’ve had to introduce deck segment gaps to accommodate the extra width. I guess it’s possible to imagine a custom 1 grid deck segment that sits between the traditional 6 grid segments that can light up. Hrmm…
It’s been a minute but I believe there is a board at the front that allows you to do this and yes the boards are standard with Fluents. The power board is off to one side.
With that said, you should 100% check in with Tecan first because I’m sure they have some documentation that can help you not fry your system.
Maybe someone else can chime in. Also you can (if requested) add more power to your system.
With the introduction of the MCA96, I’ve had to introduce deck segment gaps to accommodate the extra width. I guess it’s possible to imagine a custom 1 grid deck segment that sits between the traditional 6 grid segments that can light up. Hrmm…
I liked your idea of adding a 1 grid deck segment with LED lights, so went ahead and designed one. Will order it today and let you know how it turns out.
(We’ll probably still work on a better plate nest as we think we can implement a couple of improvements relative to the OEM one)
Thanks for sharing that document. I realized, after the fact, that the Cavro is a different LH platform.
@harmen Nice work on the deck segment. You’ll have to share what it looks like when outfitted with LEDs. Unrelated but what kind of 3D printer are you using?
I imagine the best bet here would be to take ideas from what’s currently in the field. Hamilton has springs, Tecan has ratcheting wings on two sides of the nest, and Beckman has aggressive slants to their ALPs. The new Alpaqua FLX gen2 also have these replaceable wings that could fit well into this design.
I would certainly echo Luis regarding 3d printing your original and any develop iterations, and only going to machined if you absolutely need to — not just for cost, but because of the huge amount of development flexibility it gives you. FWIW, I recently bought a Bambu Carbon printer for about $1k and I haven’t had to tweak a single printer setting since. It just works, every time. @luisvillaautomata those deck segments - could they be made of single laser cut sheets? If so, customizing them and using a company like SendCutSend to make them could be fast and cheap.
It took me a couple of iterations, but I’m finally happy with the LED deck segments. The segments (and pins) are CNC’ed from stainless steel, the LEDs are from Adafruit, and I’m using a WLED controller from Gledopto to control the lights via MQTT. Over the next couple of weeks, I’ll prepare all the design materials and publish them on our Github, hopefully this will be useful for others as well.
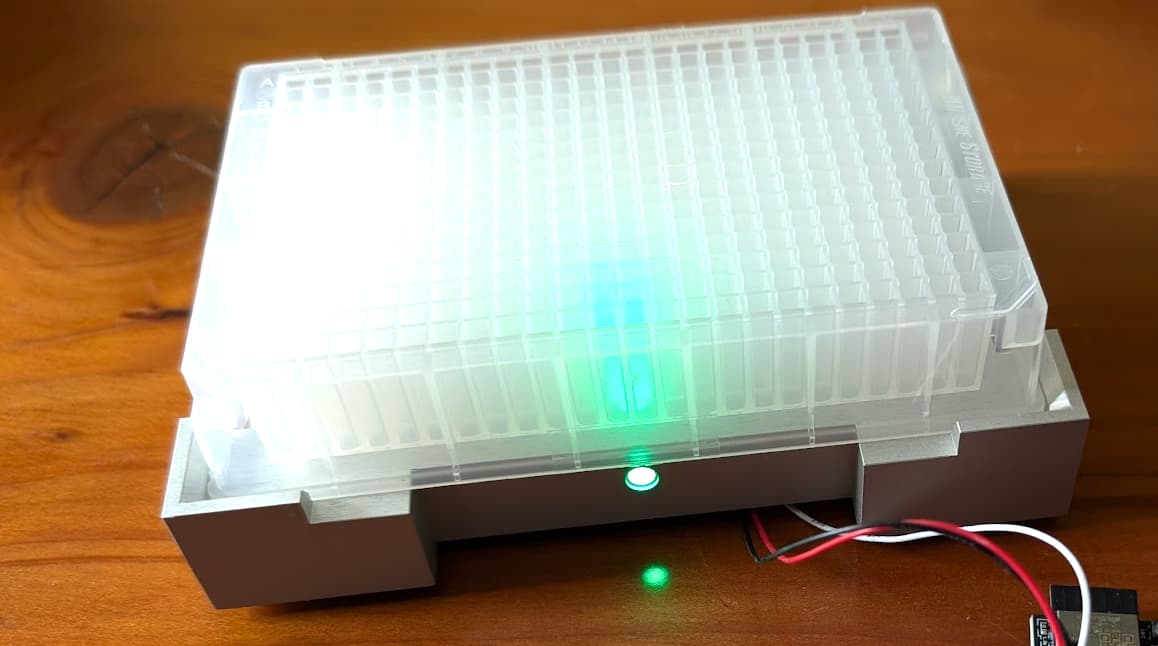
The gif shows the “boot up” animation. Here’s how we’re planning to use the lights: when setting up the deck, a guiding light next to the appropriate nest turns on in white. The user scans the barcode of the plate, and if the plate is expected, the light turns green and the next light turns white. If the plate is unexpected or has already been scanned, the light turns red. For loading tip boxes, we’ll use colors matching the Tecan color-coded tip boxes.
Absolutely! Really appreciated all the suggestions and encouragement. Working on this in the open made the project not only better, but also made it much more enjoyable.