Does anyone on here use a Hamilton (STAR) to perform sample dilution and plating in an ELISA assay? I have some questions.
I have a method to perform 4 plates at a time, diluting samples, MRD of the samples, standards and QCs, trasfer to duplicate (all happening in 96 deep well plates), then a 96 head transfer to the coated plate.
I am having several issues: Some CVs are higher than i expected (10 - 15%). The MRD to duplicate transfer is 85 uL twice from 200 uL, then the 96 head traasfer is 50 uL and I do an 80% volume x 20 reps mixing step for every dilution so i don’t understand how they are so high.
The length of time of the method was just over 4 hours (10 Stadards, 15 QCs, 23 samples, 11 with 2 step dilution and 12 with 3 step) then all diluted to MRD. I don’t have a reliable liquid class for using the same tips multiple times, so each transfer requires a new tip, so that takes a while.
Some of the lower volume dilutions low liquid error a lot (taking 10 uL out of 50 uL) which i assume is a labware/teaching issue that can be fixed with some time and patients.
If anybody has a method they use, please get in touch if you are willing to answer a few questions or advice in this issue. Any help is appreciated.
Thanks.
Do you see any trend in your high %CV samples such as order in the sample handling (first vs last) or in terms of initial volume in the sample and pipetting height if you’re not using cLLD (sample being transferred on the outside of the tip if you are going too deep inside the initial sample)?
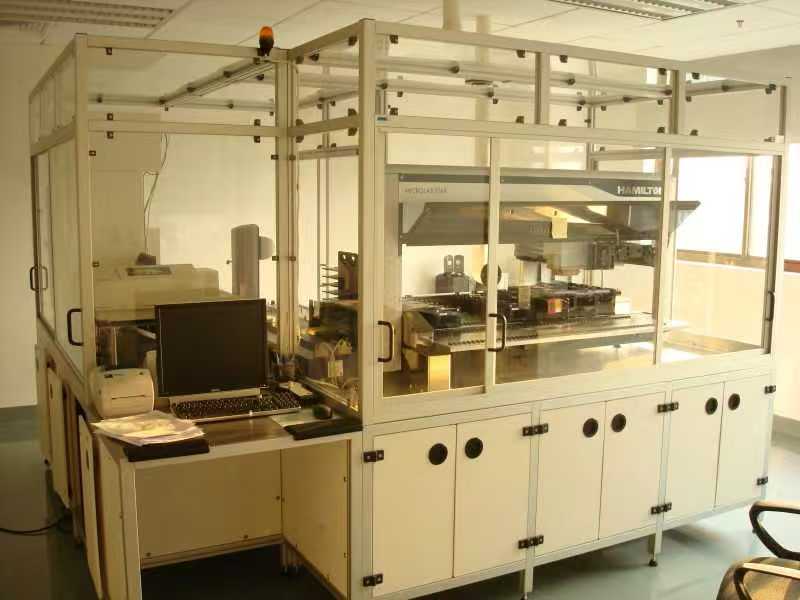
Several years ago, I did ELISA test on STAR in the image below. The acceptance requirement of this system was throughput>40 plates per day and CV<5%. There was three ELISA assays on this system, the protocal for each assay included coating, sample dilution, incubation, washing and reading, duration for each assay is about 10-12 hours.
To reach the aquirement, I worked for about 2 months, and optimized many details to pass the site acceptance test, including
- all the liquid classes
- pipetting parameters for better liquid transfering performance and low contamination.
- volume verification for pipetting head and 96 head
For your problem, you have to optimize pipetting parameters and liquid class for every pipetting step, especially for step with wet or reused tips and aliquot step, to increase the performance of liquid transfering and avoid any contamination. Also many other details may affect your assay, which you have to find, like residual volume of washing and real duration to adding stop solution, and more…
10ul from 50ul should not be an issue, we routinely take 2ul from 15ul. If you can, use 50ul tips. If you are using cLLD make sure that the sensitivity is at it’s highest. Also, I found that placing the tip 1-2mm into the liquid and liquid following during mixing works best; though I think some will argue that liquid following is not a good idea for small volumes. Slow down the mixing speed if you think liquid is getting stuck in the tip during this step.
You can use something like bromophenol blue and an absorbance scanner to test the dilution step and dial in the parameters.
Edited to add, make sure you have a pre-wetting step prior to pipetting.
@ewanfyffe : we do a lot of different elisa and differnt volume and dilution. happy to chat in more detial.
Thanks everyone for your input and offer for help. I did a run today with some labware, liquid class and teaching tweaks and got a passing assay. The highest CV was about 5% and the 1:625 dilution samples back calculated to 10 & 13% RE So that is a big improvment from the last run. I will still probably be in touch with some of you that offered help for some details about your methods.
Thanks again.
Hi Christina. What kind of vials do you take 2 uL from 15? I mainly use 1.7mL or 0.5ml tubes. The issue i have with the 0.5 mL tubes is that due to the shape and size, cLLD can’t detect volumes less than 15 uL. Ideally i’d take 10 from 12.
Ewan
Hi @ewanfyffe If I know that there will be a low volume in the tube I run it with cLLD turned off, have it touch off the bottom and pipette at 0.5mm . This seems to work for us. Make sure that your mix step isn’t more than the volume you want to take out.
Also, if you use cLLD with a higher volume and are still getting a no liquid error, it could be caused by liquid following. Try turning it off (the button is on the same tab as the mix parameters), this usually fixes the problem for me.
Edited to add: Again, make sure that you cLLD sensitivity is at its highest. It should cut down on liquid errors.
Thanks Christina,
I’ll give your touch off method a shot. I have an 80% volume mix step on my mixes.
What procedure do you use for teaching with tubes? I have been bringing the z height down until the tube won’t spin in the holder, then add a 0.2mm dead volume.
If you turn off the liquid follwing at higher volumes, do you just use a set height of 0.5mm or do the touch off technique there as well?
Thanks,
Ewan
Hi Ewan,
80% is fine for larger volumes, but mixing 10ul when 12ul is all that you have in the well could cause you to aspirate some air which will create bubbles and sample could get stuck in the tip.
For low volumes, I have read that a mix step is not needed, but I still do them depending on the application. To make sure you are only “mixing” sample and not aspirating sample+air you could do the mix with 5ul and liquid following off. (4 rounds of 5ul would be safer in your case than 2 of 10ul)
Have it mix and aspirate at the 0.5mm after touch off. You can even go down to 0.2mm and see if this helps. Also decrease the speed at which it mixes and aspirates in the liquid class. You can always pause the program to see if the correct volume was aspirated after the mix (ie, no liquid got stuck in the tip) or you can purchase the clear tips and watch the process by adding a blue die to the sample during testing (we just started doing this and it is SO much easier to visually see what the issues are).
If you turn the liquid following off, the channels just wont bounce up and down while mixing. They stay at the mm depth that you input in the mixing parameters tab. For small volumes like plates I usually put 1mm depth and large troughs I put 2mm depth but you can play around to see what works best for you.
To teach Z height, Hamilton taught me to physically touch the edge of the labware, then bring the teaching needle down till I feel it hit the bottom (the labware will slightly shift under your fingers). Then bring it up one step which is 1mm. This always works for me and if I decrease it to less than 1mm after it touches bottom I have issues pipetting because the tip is wedged too close to the bottom of the well.
We pipette out of 1.5ml tubes, 0.5ml tubes and regular 96 well plates. 1.5ml tubes, for some reason are such a pain and I am more likely to get the liquid error. For this reason I usually just tell it to pipette from a fixed location very close to the bottom. If you want cLLD turned on with the 1.5ml tubes put an error handling step in where it just moves on and goes to bottom if it runs into a liquid error.
Hope this helps, reach out if you’d like to chat more.