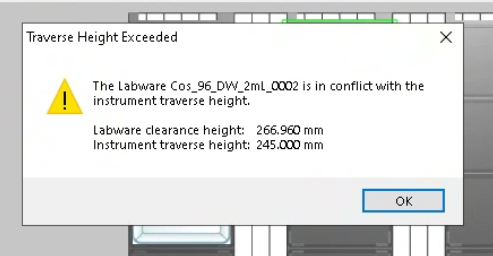
Hi All! I’m a little confused about the clearance height error that our robot is throwing with the alpaqua magnet. It’s currently sitting on a APE_Carrier, which we were told to use the PLT_CAR_L5AC definition for. The problem arises when I try to put a 2mL deepwell plate on top of the magnetic rack - the STAR keeps throwing an error that the labware clearance height is larger than the instrument traverse height. However, when I measure everything it seems like it should fit fine. I also added up the template and plate heights in the labware definition and it only comes out to 207.2. I feel like I’m missing something obvious, but I’m not sure what it is. Any help would be greatly appreciated!
HI @InnerKK ,
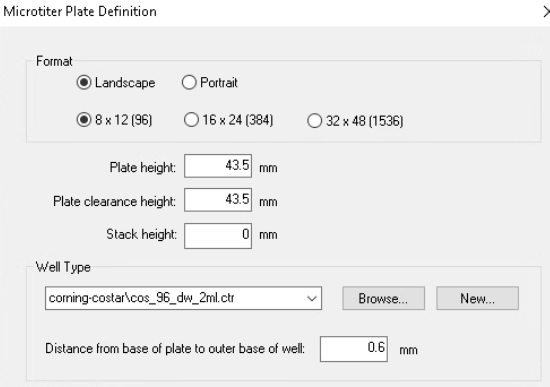
Would you be able to provide your rack and container definitions? There is more than just the rack and container geometry heights that add into the height that Venus checks for clearance. For example, check to see if the two file’s have clearance heights that are significantly higher than the heights of their geometries (rack or container total z-height might be something like 30 and the clearance height could be 45). Also check to make sure the container base offset to the rack is correct along with the container base thickness. If these are higher in the definition than what you measure then your labware definition is falsely forcing the containers to be higher than they should be, further increasing the clearance height that Venus calculates.
Matt
Hi Matt,
Thanks for responding! Here are the 3 definitions I’m working with:
96-well DWP
Alpaqua Magnet

Carrier

I’ll also check the container base offset and thickness.
Hi @InnerKK ,
The message that you are seeing in deck layout is calculated from the labware’s current position in space and uses the clearance height from the labware measuring from the bottom of the skirt. If that value exceeds 245.0 then the warning that you see will be thrown.
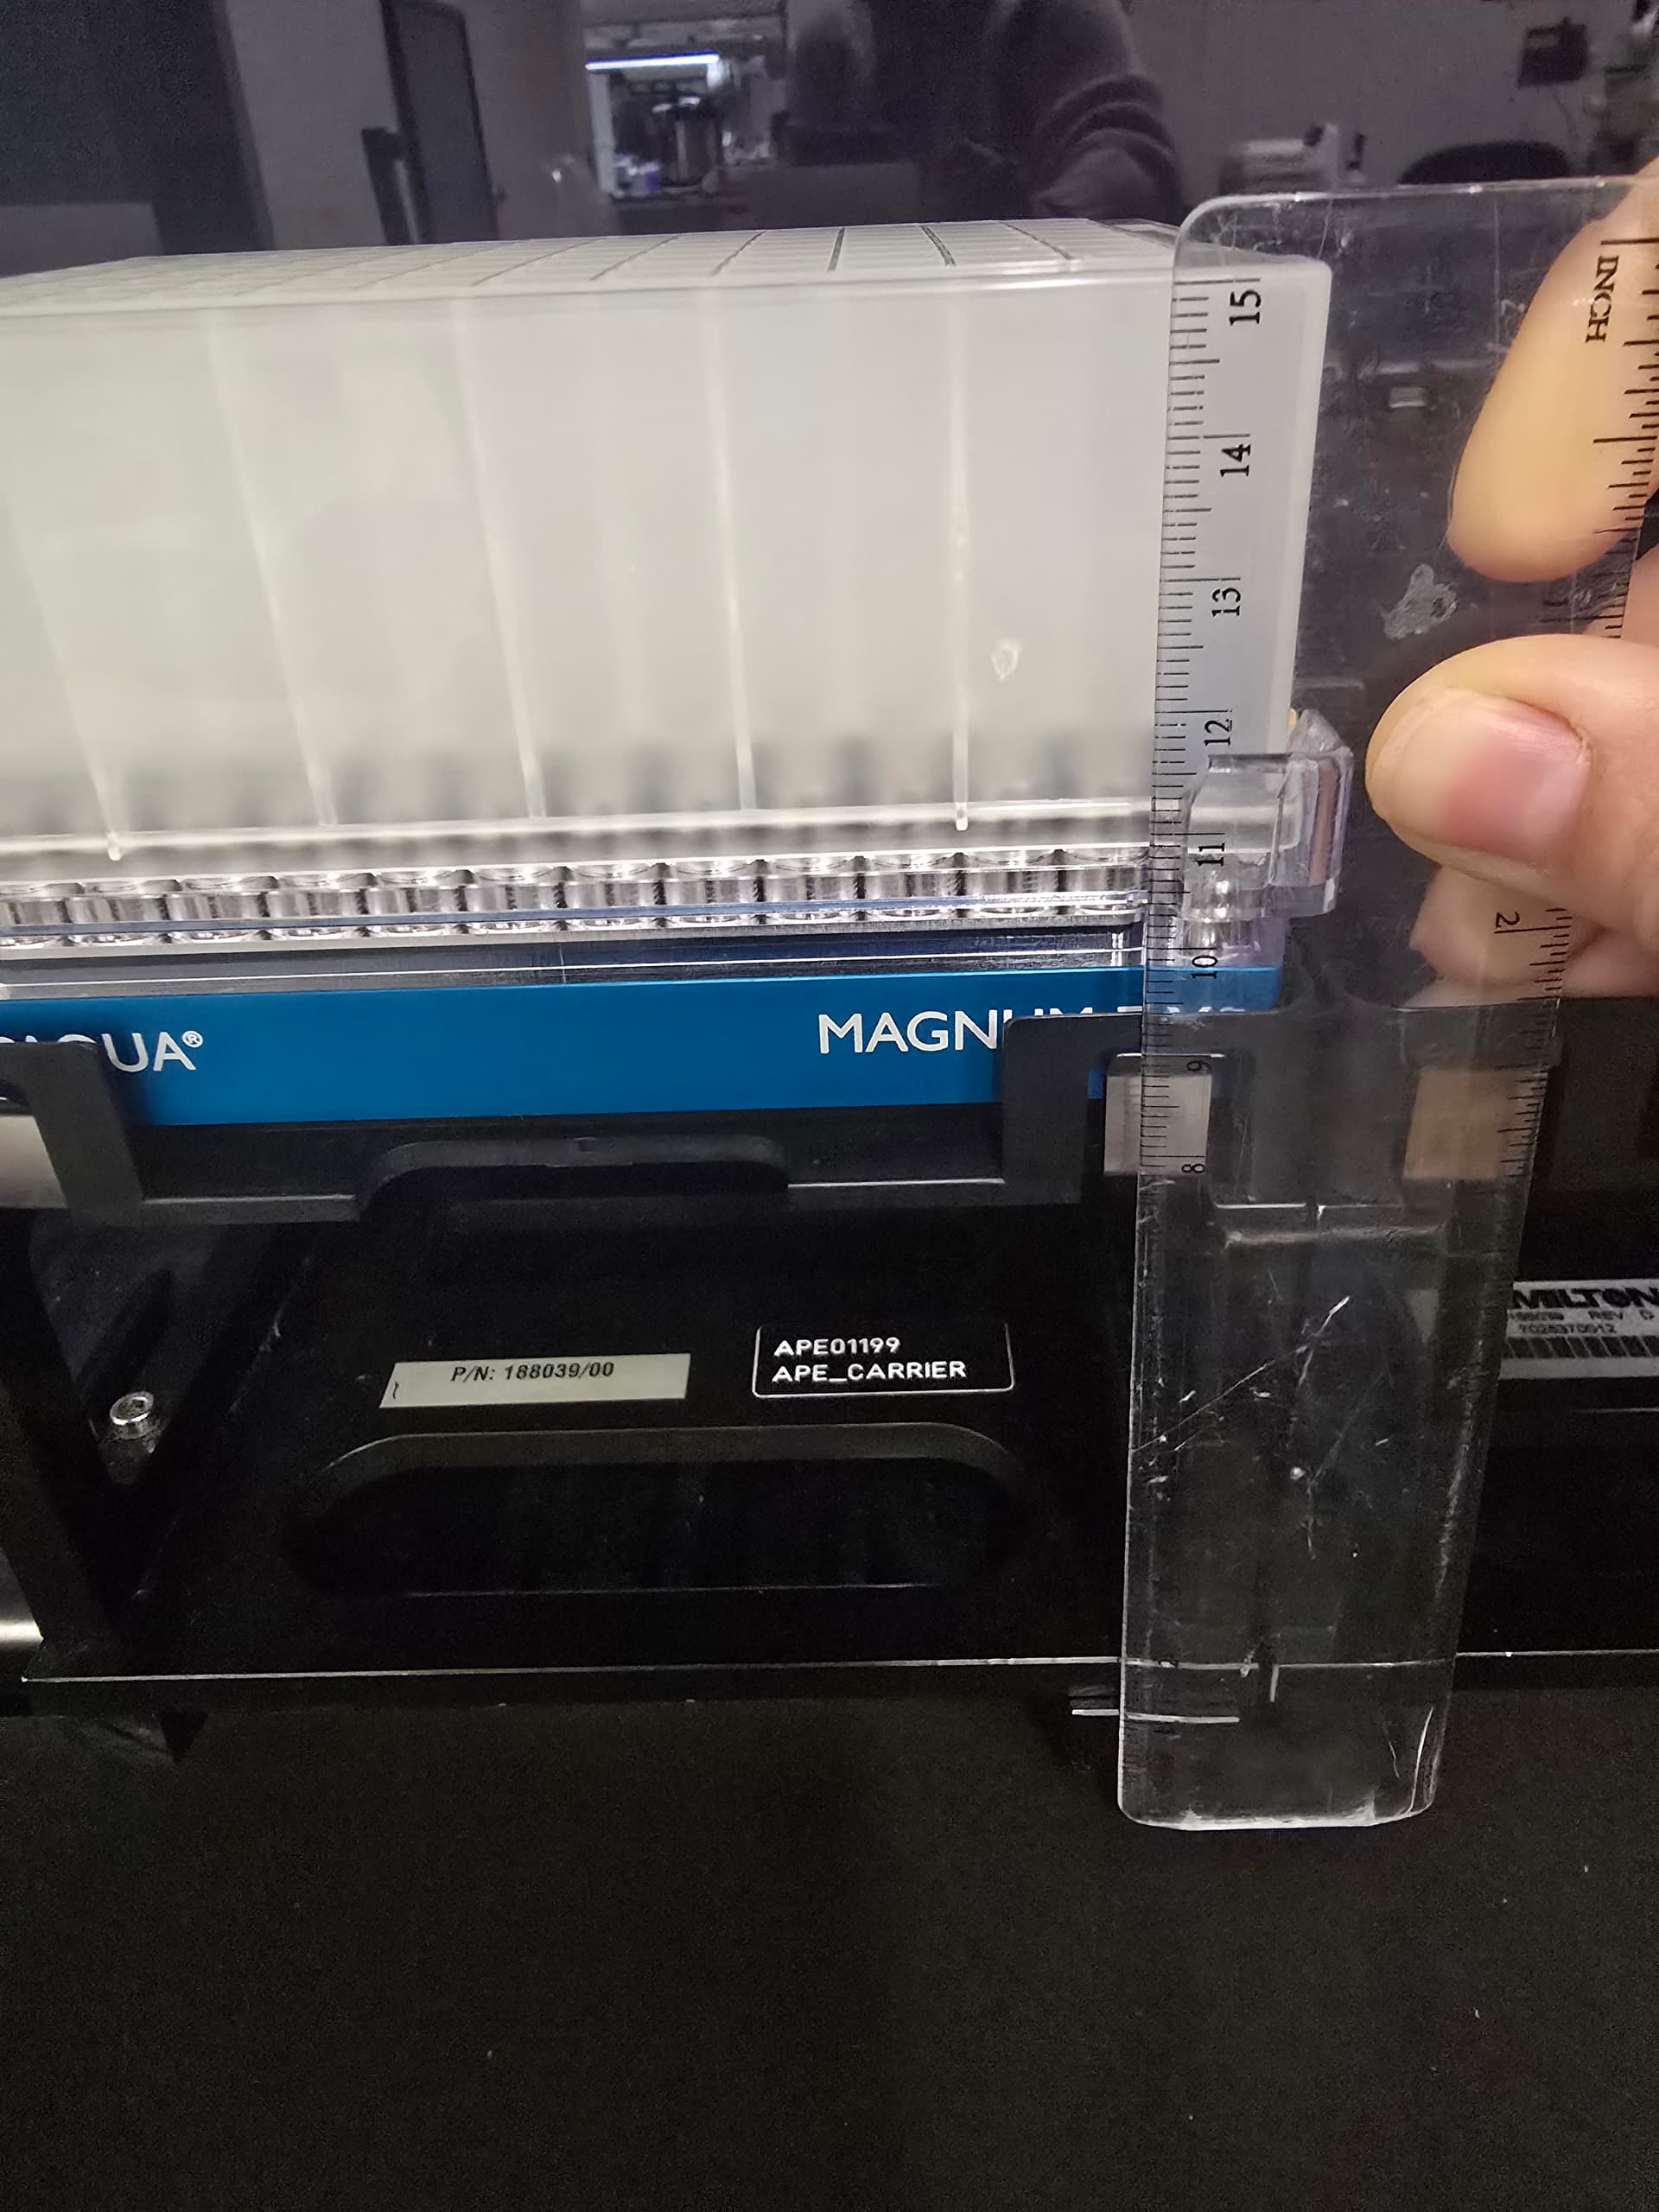
Based on your measurement, I see that the top of the plate sits at 15 cm (150 mm). The zero point of the deck layout is 100 mm below the deck, so adding that to your measurement would put it at 250 mm at the top of the plate which is 5 mm over the safe travel height. You can verify this by closing the door and slowly pulling the carrier out. The bottom of the door is 245.0 (145.0 mm from the deck). If the plate makes contact with the door, then the channels will also make contact with the plate.
The 266.96 number depends on the labware definition (clearance height) and the teaching of the plate but based solely on your measurement picture I believe that your labware will sit too high.
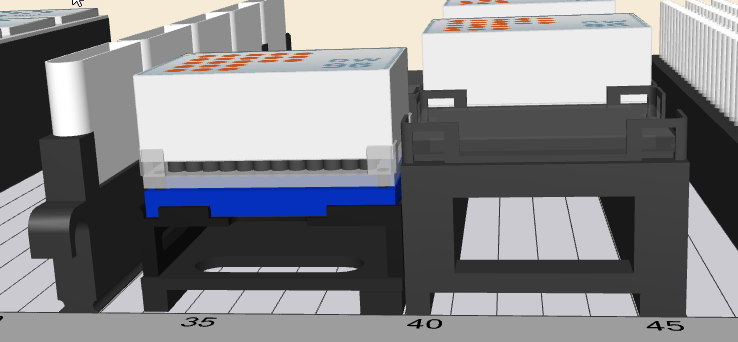
To accommodate an Alpaqua magnet and a 2 mL DWP, you will need a lower MFX module like the one shown below:
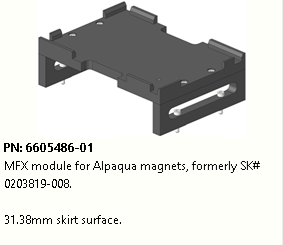
This will lower the plate height down to accommodate for the added height of the magnet. It should look like this:
We also offer an even lower module where there is no riser at all which sets the magnet effectively on the carrier base.
2 Likes
Hi Brandon,
Ahhh ok that makes. I did the door test and my current setup definitely won’t work haha. I will look into the MFX module, I think that would be the best solution for us. Thanks so much for responding, I really appreciate it!
3 Likes
FYI, I’m not too big of a fan having a magnet on a autoloadable carrier, its doable. The reason being is that we have had a few instances where an operator knocked the magnet off of the carrier and break one of the tabs on the magnet. We usually keep a few spares in this case, and either buy another spare or send it out for repair.
Also, I like to label the orientation of the magnet, some operators like to rotate them all the time.
Hi Brandon,
Is the bottom of the door 145 mm from the deck for all enclosed Hamilton liquid handlers (Star/Star-V/Starlet/Vantage)?
Hi @UCantBcereus ,
Yes it is. The door can be used as a clearance test for all STAR and Vantage devices.
1 Like
Hi Brandon,
A different question that applies to this same problem - we got a shorter carrier and I’m trying to train it with the probe, but I keep getting the error “Move probe is not allowed in simulate mode” (Qx28-Qx1-Qx3). I tried it with one of the original carriers and still got the same error. The robot is not in simulation mode, am I just missing something here? I haven’t tried to teach a new carrier before, only labware, so I’m wondering if I’m doing it wrong. Thanks!
Never mind, I figured it out! I didn’t realize that there was a simulator on/off button on the GUI that overrides the simulation on/off on the run control.
1 Like
if that position is strictly for the magnet, have you thought about removing the brackets on the side and fixing the top of the nest directly to the bottom of the carrier via the supports? I can send pictures if that helps, this was the only way we were able to use a magnet with deep well plates and 1000uL tips.
1 Like
Hi thetoly,
That’s actually what we ended up doing! We basically just removed the “legs”, and then 3D printed some small supports that lined up with the top part screw holes and the bottom part screw holes since the holes don’t match up and it works great!
@thetoly when you first added yours to the STAR, did you just manually change the Z-height values or did you teach the robot where the Z-height of the new carrier using the probe? And if you did use the probe, did you just use it on the carrier or did you add a plate first? Thanks!
Sorry just getting back to this, didn’t see the update. We re-taught the location of the plate on the magnet based on the new labware height using the probe/head. We did adjust the height of the carrier (new carrier definition) as well to reflect the graphic representation (so the plate doesn’t sit under the carrier in the layout) and Z limit considerations.
1 Like
@thetoly did you transport the DWP on and off the magnet using the iSwap or CO-RE grippers? I’ve adjusted the heights of the carrier and the magnet but its still saying the labware is too high to move when I try and use the iSwap.
Never mind, I figured it out. The default grip height for the plates I’m using was 3mm, not 13mm, so that’s why it was throwing an error.
1 Like
Hi, just curious. Did you find this specific MFX module? Did you find it helpful?
Hi! We actually just ended up taking the side supports off the APE carrier, and then our engineering team 3D printed some screw adapters for us (the screw holes at the top of the legs and the bottom don’t match up). For the carrier definition I just subtracted the height by the difference between the legs and the support and it works great!
wow that’s impressive!
It was really easy! I think someone posted in the 3D print topics a similar support piece? If I find it I’ll link it here!
1 Like