Just out of curiosity but is there a cheat sheet for making mesh/texture files for labware/devices?
I’ve tried to import X3D graphics but had problems.
Just out of curiosity but is there a cheat sheet for making mesh/texture files for labware/devices?
I’ve tried to import X3D graphics but had problems.
There is a tewiki page about creating custom models that has some hints and common issues. Might have to email the helpdesk to obtain a copy. I’ve created a few and I think the hardest problem for me was converting to X3D in a way that the shape is full and not just a shell, which the Fluent didn’t like. I think I used some wonky camera software for this and had to play with import export settings a ton before I could get it to work.
Interesting. You’ve had this problem even when given a CAD file from the vendor?
Only when creating models myself, so far.
Ah makes sense, it seems simple but it hated my X3D file I guess
This was a few years ago at this point, but I think it had to be exported with certain features enabled - something like including mesh instead of vertex outlining and I think the orientation was crazy - I had to export 3 or 4 times before I could figure out where “down” was on the model export.
I wish I had the file, software, or instructions to share but those stayed with my old job. I’d say best path forward would be to contact helpdesk to see if you can get that te-wiki printout, which in itself wasn’t all-inclusive but had a lot of direction.
Yeah that was my impression as well, there’s one or two things that aren’t aligning. I’ll reach out!
You ever figure this out? I attempted it with Blender but couldn’t figure it out.
Yeah I tried with Blender straight up and it was not a fan but as @evwolfson hinted… maybe I missed some export setting.
With that said, I believe it’s something like the following to create the Mesh File
That’s about the extent of what I know
I have tried to import the x3d files into the FluentControl software, but for some reason the software always quits when I try. And even when Fluent Control does not quit on me I still find that data is not imported correctly.
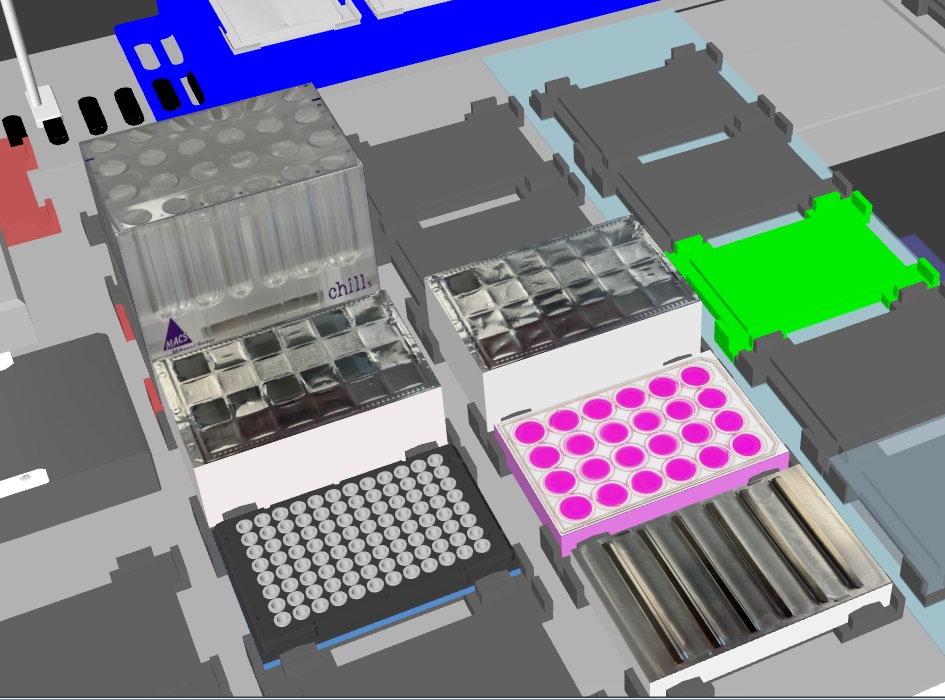
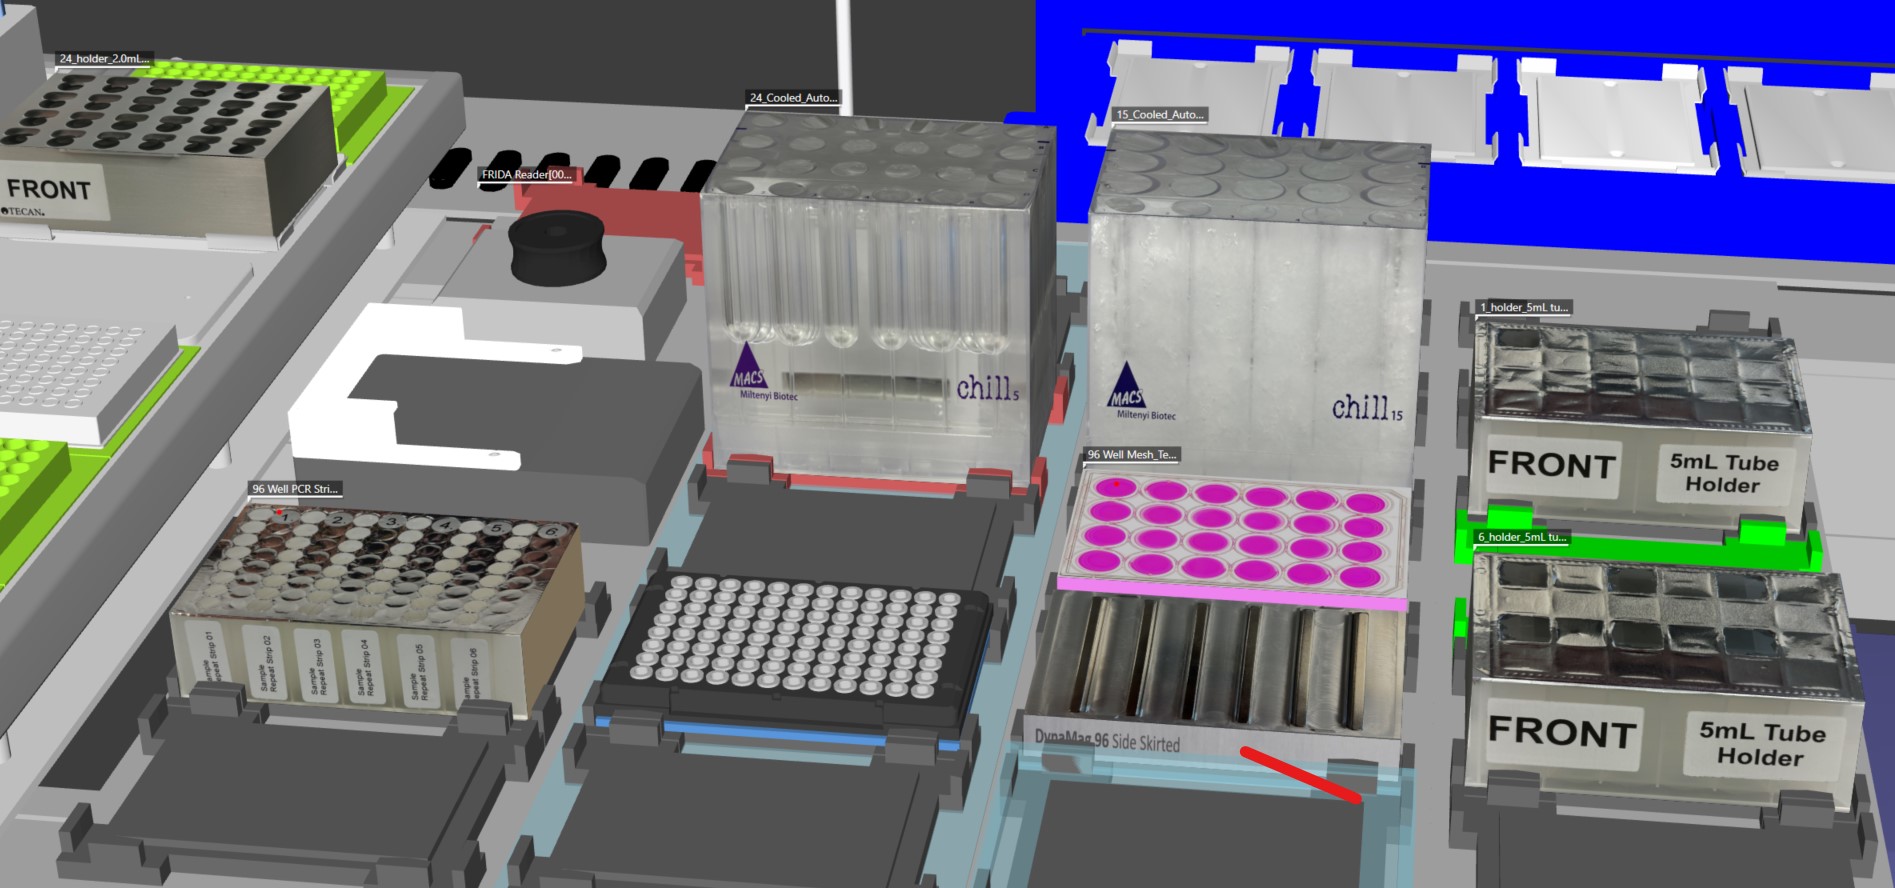
So here is my solution to creating nice looking custom labware. Just upload the JPG files for the labware and you’ll be able to get something like the picture below. I’ve created custom top sides for the DW plates, 24 Flat-Bottom plate and also a DynaMag 96. For the Automacs Chill 5 rack I’ve created all sides and when you rotate the deck it looks awesome.
The Alpaqua 96S plate was in the system already. I’ll write a short protocol on how to create and then post it.
Alright. Here is my mini-protocol to add full texture to labware
It works very well for just the Top file as well. In this case you can try to match the labware colour with the picture of the top to create a beautiful combined set.
And just giving a bit of extra information on the location of the Mesh and Texture files. Uploaded jpg files go into the Textures folder. I tried uploading x3d files and they go into Meshes folder.
UPDATE CUSTOM LABWARE
Wow @dirkvanessen thank you on behalf of the internet for this really detailed guide! Nice job!
For the mesh file (*.x3d) option, I also didn’t manage to directly export a *.x3d file from Blender, but when you save a model as *.blend file and then convert it with the following free online converter from *.blend to *.x3d
it could import that *.x3d file as a mesh file to FluentControl. Unfortunately I didn’t manage to also import the materials from Blender this way, but could choose the color of the entire mesh with the color dropdown of the carrier defintion.
The old software that I used was Vivaty Studio (Vivaty Studio | Web3D Consortium). I don’t remember being particularly thrilled to use it or as if it was a good fit, but it is the software that was recommended by TeWiki
Last week I had a quick talk with one of the Tecan representatives and talked about the mesh file as well. He said there is quite an extensive database at Tecan and that you can just as to get one (I got one within a couple of days so that was nice), but he also supplied their way to convert your own mesh files.
This is the order to work with file types: .stp/.step/.tcw
You need to use a 3D rendering program like: TurboCAD or Autodesk Fusion 360 where you can import stepfiles from suppliers or create you are 3D drawing.
Edit orientation in Turbocad (helps to view from the top down viewport and rotate the mesh exactly how it should be situated in FC)
Export in .3ds format
Open in AccuTrans3D and save as x3d.